Wednesday, May 30, 2012

Nail Ideas: Ladybug Nails!

Good morning! I hope your week has been well so far! I've been nursing a flu bug for the past few days - right after I had a small bout of food poisoning. urgh. :~

Anyway, here's my winning entry for @brummingbird's dotting contest on Instagram! It's the first time I've won any nail art competition so you can imagine how happy I was! :e If you are interested in joining these competitions or looking for nail art inspirations, I highly recommend you to join the IG polish community - some of the girls have really nice nails and are really creative! You can find me @thepolishwell :h


This was actually a last minute entry (literally the night before the competition ended) because I was feeling strangely uninspired for a long time. While mucking around the house and watching random children programmes with the kids (they are having school holidays now), I saw the host wearing this really cute T-shirt design with some ladybug prints on the shoulders. Naturally, I had to do it for my nails! ;)

The biggest dots were done using a bobby pin while the smaller dots were done using a toothpick and a pin.


What do you think of this?

xoxo,
mich

Sunday, May 27, 2012

Deborah Lippmann: Ruby Red Slippers

As promised, here's the last DL I have in my stash - Ruby Red Slippers!

2 coats of Deborah Lippmann's Ruby Red Slippers over black
It's a killer. :L Red and black has always been one of my favorite combos. It just oozes so much class! So, it's unsurprising that there are many other red and black glitter polishes such as China Glaze's Lubu Heels and Rescue Beauty Lounge's Black Russian.

But what makes Ruby Red Slippers stand out is the scattering of chunky red glitters in the mix. Now, that's a lady who is confident enough to flaunt her stuff without overdoing it! The balance is perfect! There is just enough large glitters to make a statement without being overwhelming. And when the glitters catch the light, they positively glow. Incredibly sexy. <3


Are you in love yet?

xoxo,
mich

Saturday, May 26, 2012

Updates!

Oooff!! This past week has been pretty nail art intense, hasn't it? I've literally squeezed my brain juice dry working on nail art submissions. But I'm not complaining! It has definitely been fun! :P I have more nail art posts (and my last DL) to show you over the next few days but let's take a wee break and have some updates, shall we? I promise, you won't regret sitting through this. I have some wonderful treats for you at the end! ;)

A few Several days ago, jayo and I went for a wonderful sleepover with two of our friends, Cheryl and Cheryl (sorry I couldn't resist ;) ) before they fly off for their holiday trip! We had loads of fun playing WII (I came in last for all the games except for one - urgh) and mahjong. Of course, what would a sleepover be without some nail painting? I only wished we had more time to do more!
Tribal nails that I did for Cheryl
Stayover aside, I also did some serious shopping and hauling in the past few weeks! :$

First, I went on a polish shopping trip with Cheryl (Cherily). We went hunting for Essence at Orchard and popped by the temporary Smoochiezz store at Far East Plaza to grab some polishes on our wishlist. Unfortunately, the selection was rather limited so we didn't manage to haul as much as we'd wanted. We then headed off to Chinatown's PNC Traders to grab some nail supplies (finally got myself some pure acetone and glycerin to make my own remover!). We also looked around for some glass cabochon and ring settings to make some jewelry during our sleepover but we didn't manage to find any :( Instead, I found... L.A. Girls' Uninhibited!! Score!! :e
The polishes I hauled on the polish shopping trip!
Just a few days ago, I went shopping with my sister for her work clothes and I found some pretty interesting polishes too! (Sorry for the slightly blurry shots - I was sneakily taking pictures)
Some polishes from Bisque with pretty interesting glitters and colors - spotted at Chameleon @ Jurong Point
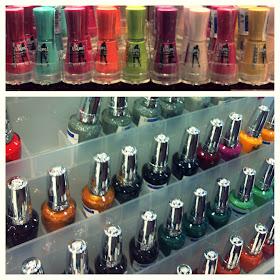
More polishes spotted in Robinsons @ Jurong Point
Anddd... I couldn't leave the mall empty-handed, could I?
During my visit to the orthodontist, I popped by Watsons to find...
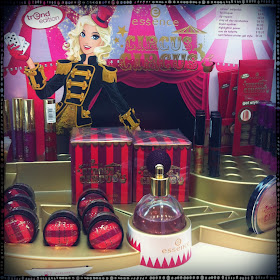
The Circus Circus Trend Edition!!!
Woooohoooo~~ So the Essence people heard us after all!!
Unfortunately, most of the polishes have been cleared out already. As you can see, there's only the pink duo (Cotton Candy) left on the shelves in all the three outlets that I've checked. The two empty rows on the right probably had Applause Applause (the red) and My Sparkling Acrobat (gold glitter). Thankfully, Cherily had already helped me grabbed one of each before they were OOS. Strangely though, I don't see a slot for Don't Feed the Tiger. It was one of my lemmings from this collection (black square glitter - how could I not?)! :(
If any Essence people are reading this by chance... urm... would it be too much to ask for Don't Feed the Tiger? *flutters lashes* Oh and, the Vampire's Love Trend Edition? Pretty pleaseeeee? :L

I also spotted these Golden Rose magnetic polishes at the Watsons in Ngee Ann City. A pretty good and inexpensive alternative to the Nails Inc ones at Watsons if you ask me ;) You can check out some swatches here.

Of course, the month wouldn't be complete without some... nail mails!

My haul from the $5 sale! I should have gotten more, right?! *facepalm*
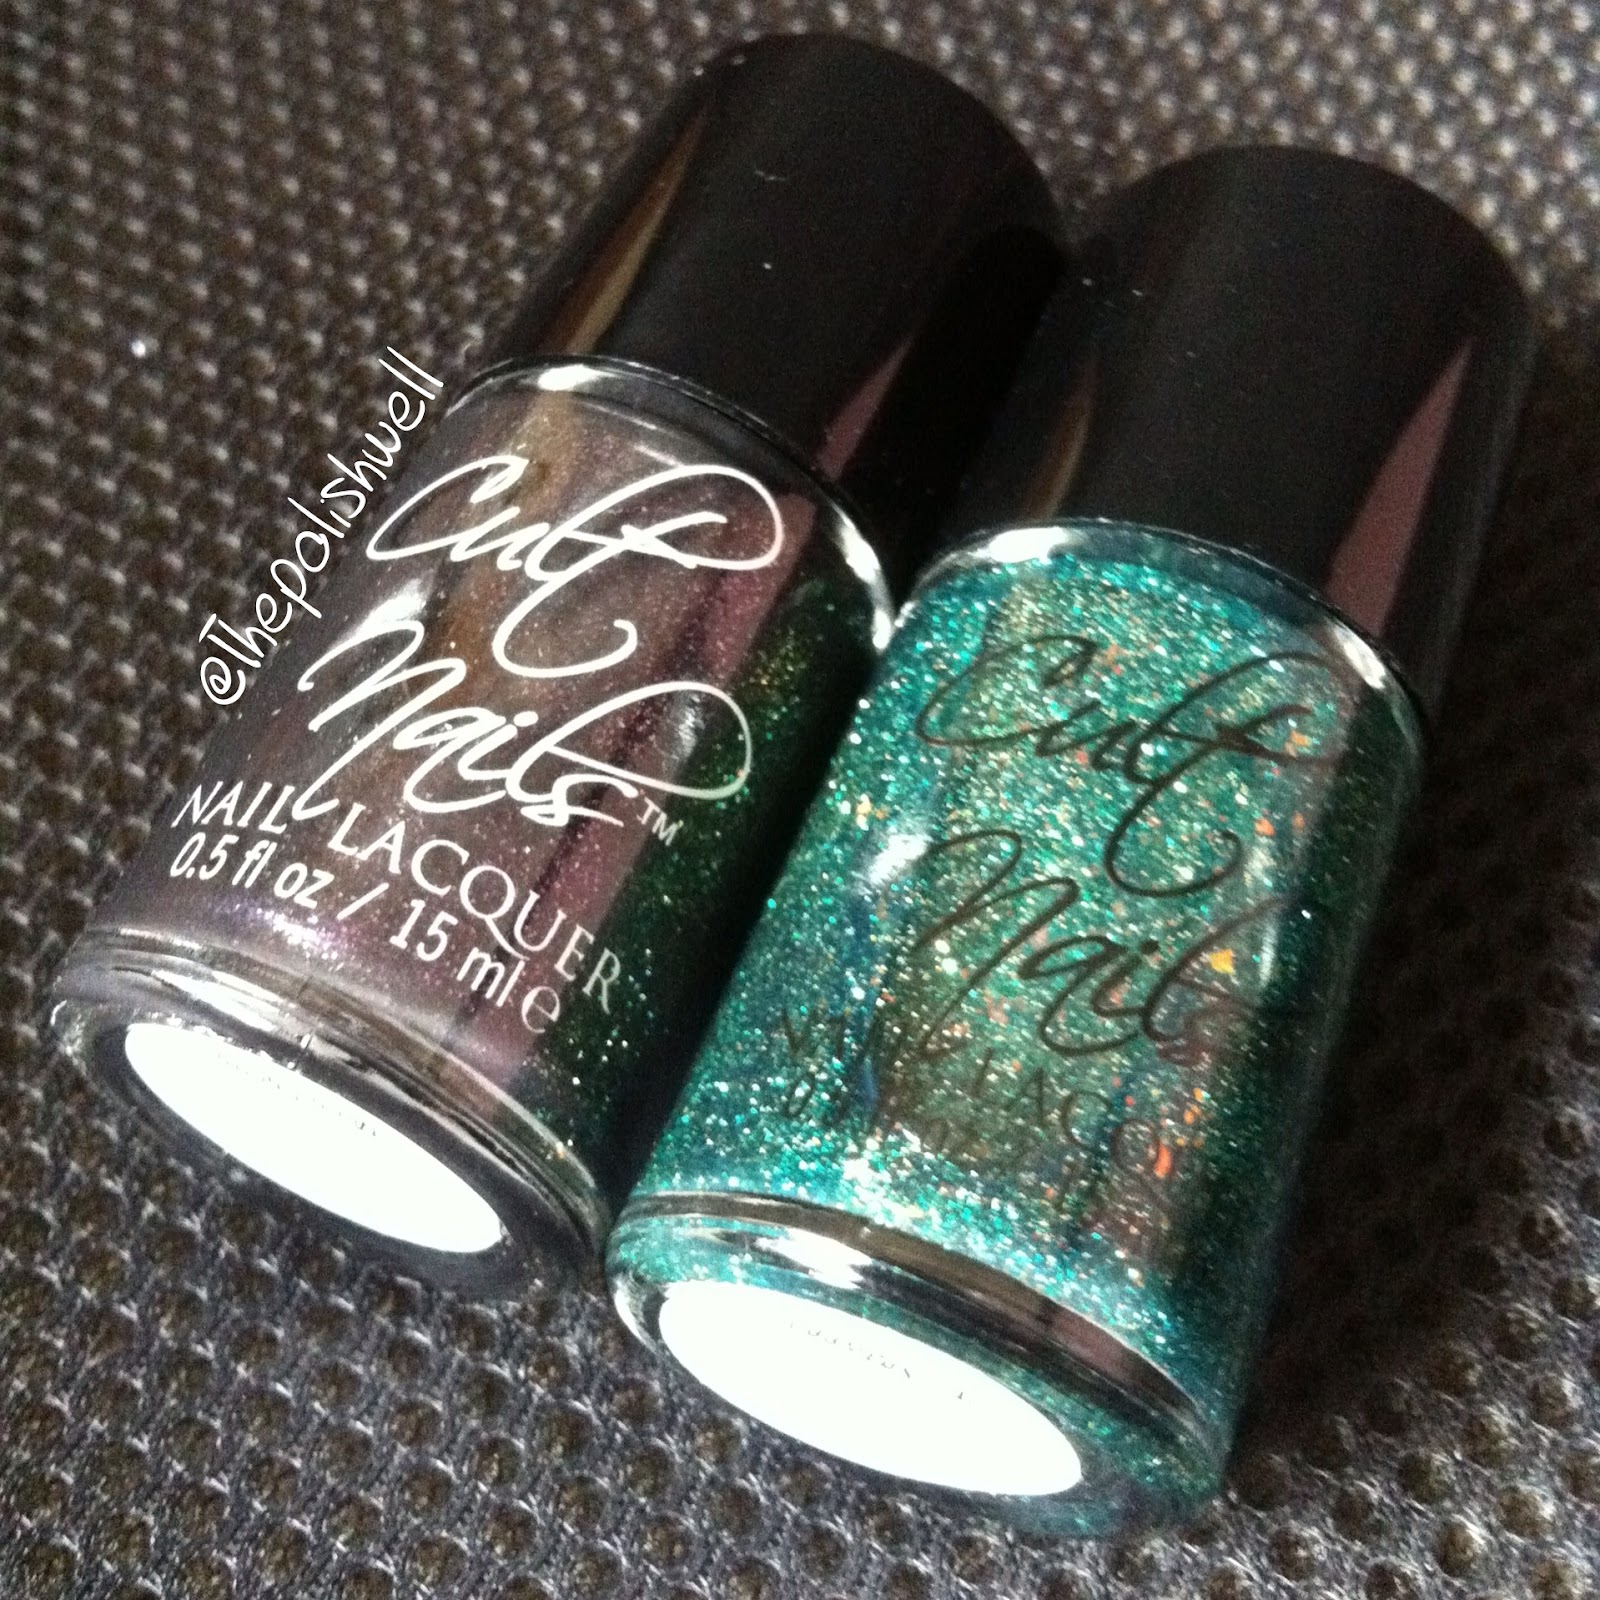
My very first RBL - Halcyon!
And some polishes I've won in Funky Frenchies' giveaway! You should definitely check out her blog if you haven't!
Phew! That was quite a haul post, right?
I really ought to be restraining myself and sticking to the no-buy...
Buuuut... there are so many promos going on right now!! *tears hair out*

First, with the Great Singapore Sales going on now, TimTam is giving a whooping 20% off all blog prices (except Blaze and Gelish)!
Yup, you heard me! OPI, China Glaze, Essie, Orly, Zoya and even Barielle are going at 20% off - including the new China Glaze On Safari Collection (yes, it's available here already)!
Now, tell me, how can I possibly resist that!? I'm already scrolling through swatches to finalise my list. >.<
Note: To qualify for the discount, please quote TPWGSS in the email header when you place your orders! ;) I think she ships international too!

To make matters worse (for my wallet) and better (for the polish addict in me)... EClectic Co. has managed to bring in ManGlaze to Singapore and Asia! The original, one and only matte nail shit!! *shrieks in excitement*
I have been lemming these since.... forever! I love the matte finish, colors AND the wicked cool packaging and names! And by 'cool', I mean super cool 8) I may be just a little childish but if someone comes up to me and ask "What's that interesting color you're wearing on your nails?", I would love to smirk and say "Fuck off & dye". I'm guessing the look on their faces would be simply priceless. :vD
Anyway, I digressed.
EClectic Co. has brought in all 13 shades of coolness with each retailing at S$22.50/bottle or at a promo rate of S$21.50/bottle for 3 bottles or more.
As a special treat for my readers, quote MGMICHC for an additional S$1 off each bottle! Yup, each of you can have as much as S$2 off each bottle!

Happy shopping!
Oh and you're most welcome ;)

xoxo,
mich

Friday, May 25, 2012

Nail Ideas: Floral Water Marble!

Annnnddd I'm back with another nail art! I'm on a roll these days! ;) There seem to be quite a few nail art contests recently and since I'm on a holiday, there's no reason why I shouldn't give them a shot, right?

So I decided to try my hand at a floral nail art contest hosted by Kayla at Nails by Kayla Shevonne.
After seeing a few beautiful floral water marbles, I've decided to give water marbling a shot again and here's what I've got:


Wheeee~~ Finally a successful water marble for myself!! :e

If you have been following us for a while, you may have noticed my water marbling fail a few months ago. So what did I do right this time? Filtered water. I swear it made all the difference in the world! You should definitely give it a shot if you are having trouble with getting the polishes to spread.

The only thing I've yet to work out is the bubbles. I got an enormous bubble on my index finger that refused to go down and popped in the most dramatic fashion (by leaving that gaping hole) when I applied top coat. :f What a way to burst my bubble - just when I thought I finally mastered water marbling too! Ah wells.


So what do you think of water marbling? Do you have any tips or pointers?

xoxo,
mich

Wednesday, May 23, 2012

Tutorial: Rainbow Stripes

After getting some requests on Instagram for a tutorial, I've decided to stop procrastinating and put together a video tutorial for these rainbow stripes!


This is my first time making a video and I guess it's pretty obvious when you watch it. I couldn't help cringing myself through the whole 5 minutes and 56 seconds of it. :f (I swear I don't sound this strange IRL but I just couldn't snap out of the "reading" mode when faced with a recorder :/)
In any case, I'd spent almost an entire day fiddling with it and I just couldn't bring myself to do it again for another day so I've decided to just upload it. :P


For your reference, here are the polishes that I've used:

Red - O2 Skin MK0220
Orange - red + yellow
Yellow - China Glaze Happy Go Lucky
Green - yellow + blue + a little indigo
Blue - China Glaze Electric Beat
Indigo - L.A. Girls Dance Studio
Violet - indigo + red + a little white creme
White base - Orly Au Champagne

Do let me know if you have any suggestions or tips for making video tutorials. Any help will be much appreciated!

Also, feel free to ask any questions in the comments (even if it's a request for other tutorials - if you happen to like this one that is)! As usual, I will do my best to get back to you asap! :i

xoxo,
mich

Sunday, May 20, 2012

Nail Ideas: Rainbow Stripes!

So what's that mysterious manicure that I refused (and still refuse) to remove, you ask?

Here's what has been gracing my nails since Thursday:


Isn't it colorful and fun!? :L I first saw this manicure here at Manicurator and it was love at first sight. So I had to recreate it for myself!

It is quite a simple manicure to do. Basically, you plop a drop of polish on a clean surface and swirl it around until it thickens and gets stringy. Then, you pull the 'strings' of polish across your nails to get the stripes. There you have it! Simple... but a little tedious. Worth the trouble? Definitely.

I would leave this mani like this if I could but I added top coat to seal in the design. I didn't want to because Seche Vite melted down and flattened the stripes, making them less distinct. Oh but what to do? :( The 3D effect was good while it lasted.

You can find me on Instagram @thepolishwell :)
Colors used:
Red - O2 Skin MK0220
Orange - red + yellow
Yellow - China Glaze Happy Go Lucky
Green - yellow + blue + a little indigo
Blue - China Glaze Electric Beat
Indigo - L.A. Girls Dance Studio
Violet - indigo + red + a little white creme
White base - Orly Au Champagne

So, what do you think of this mani?

xoxo,
mich

[edit: I've made a tutorial for these stripes here :) ]

Saturday, May 19, 2012

Nail Ideas: My Little Pony

I had wanted to blog about my last DL in my stash for today's post but I only just realized I had not swatched it! o_O I remember seeing the pictures in my computer! Ah wells, can't deny I'm getting old. I would swatch it now but I still can't bear to remove the mani I did on Thursday (more on that tomorrow).

So instead, I will be showing you a mani that I did for Rainbow Honey's Blogger Nail Art Contest.
The theme for the contest is... My Little Pony!! :L

source
I have to admit that I did not watch MLP until recently. Granted, I had watched one or two episodes previously but the hectic school term did not allow me to catch every single episode. So when I saw awesome pictures of Dee's (Rainbow Honey's) newest collection, The Equestria Collection, I swore I would start watching all the episodes of MLP. That explains why I have not been posting at my regular times - was too caught up with MLP and other TV shows :$

Anyway, here's my entry for the contest:

[From thumb to pinkie: Rainbow Dash, Rarity, Twilight Sparkle, Pinkie Pie, Fluttershy, Applejack]
I've thought really long and hard about the designs and I decided that the only way to include all the ponies (Believe me, I wished I had a sixth finger to do a design for each pony - I love them all!) is to do a simple stripes design with all their colors. It also shows how the colors of one pony lead nicely to that of another ;) I suppose they call that 'harmony', right?

All the stripes were done with a nail art brush and the cloud was done with a bobby pin.
The nails are also topped with one coat of China Glaze Fairy Dust for that extra magical sparkle!
Except the red on the rainbow, the white on the cloud and the blue base color on the thumb (China Glaze Electric Beat), all other colors used are mixed from other polishes.


There are a lot of other amazing nail art submissions that you can view on blogger or on facebook. If you can, please hop over to have a look and vote for the entries that you fancy! ^_^

And here's a brief look at The Equestria Collection:

source
Yup, it's that awesome! More swatches here.
Drooling yet? You're welcome! ;)

That's all from me today! I shall head back to watch more MLP! Just finished Season 1 Episode 9 yesterday and I was literally in stitches from laughing so hard!
Any other MLP fans out there? :i

xoxo,
mich

Wednesday, May 16, 2012

Deborah Lippmann: Bad Romance

Well, it seems like we're having a mini DL series here for the week! ;)

Bad Romance was another Deborah Lippmann polish that I got along with Across the Universe. I mean, come on, how could I resist Lady Gaga?


Bad Romance is a sheer black polish filled with small and larger purple hex glitters. I like the purple and black color combination. It gives a very edgy look that, I thought, matches Lady Gaga to a T.

Pictures are shown with one coat of Bad Romance layered over black.


Application was smooth - as I've come to expect of DLs. The glitter was a little less dense so it helps to shake the bottle up a bit to get the larger hex glitters.

So, what do you think of Bad Romance?
*gaga, ooh la la~ want your bad romance~* :tone :mj

xoxo,
mich

Sunday, May 13, 2012

Deborah Lippmann: Across the Universe (and Essence Blue Addicted)

When I first started my polish obsession in October last year, Deborah Lippmann's Across the Universe was one of my biggest lemmings. Thankfully, my best friend kindly agreed to help me buy and bring some polishes back to Singapore during her vacation (she's studying in the States now).

So here's the beauty that got me drooling all over my laptop:


Across the Universe is a sheer deep blue jelly with green and silver (blue?) glitter suspended dreamily in the dark-colored base, giving it a look with incredible depth that's almost mesmerizing. It is one or two shades darker than it looks in the pictures but I could not get the camera to capture that.

Because I dare not waste this precious polish, I layered two coats over Essence Hard to Resist.


Of course, at about USD 18, Across the Universe is slightly pricey.
The good news is that there is a cheaper dupe by Essence - Blue Addicted. And, you've already seen it! Look at the pictures again, could you tell which is which? :et I couldn't. For the record, Essence Blue Addicted is on my pinkie and middle fingers while Across the Universe is on my ring and index fingers.

While they look identical, the formula is a world of a difference.
ATU has a better formula that is smoother and much easier to apply.
On the other hand, BA had already turned gloopy in the bottle. There was still a lot of glitter at the bottom of the bottle even after I shook it until my face turned the same shade as the polish. :|| It was still possible to paint my nails but I think it made BA looked a smidget darker because I simply plopped on the gooey mixture onto my nails and smeared it around like it was some blueberry jam. :f

Close up of Deborah Lippmann's Across the Universe
Isn't it gorgeous?!
What do you think of this color?

xoxo,
mich

Saturday, May 12, 2012

Essence: Hard to Resist

Here's another Essence color that I've picked up quite a while ago and I don't quite know what took me so long to wear it.


 Hard to Resist is a truly gorgeous shimmery deep blue that has that glow-in-the-center look that I'm such a sucker for. There is also a very subtle hint of purple at sides of the nails! <3


*swoons*
Beautiful, no? All pictures are shown with two coats although it is a potential one-coater. I used two to bring out the richness of the color.

The formula was smooth albeit a tad thick after being kept in the drawer for so long. I just wish that they had those tiny metal balls in the bottle so that it will be easier to mix up the polish. I shook the bottle until my face turned blue but it still looked like it needed more mixing. :|| Then again, for SGD2.80, there isn't much that I can complain about, right?

What do you think of this color?

xoxo,
mich

Wednesday, May 9, 2012

Essence: Choose Me

Well, it's already said 'choose me' so how could I not?


Choose Me is a really beautiful polish with flecks of gold and green swimming in a sheer blue base. It looks like a close or exact dupe of the other popular colors like Zoya Charla, OPI Catch Me in Your Net and Orly Halley's Comet - just at a fraction of the price and size.

The color reminds me very strongly of the crystal clear sea blue/green waters that you often see in the holiday brochures. The twinkling specks of gold look almost like the sunlight reflecting off the surface of the sea. Breathtakingly unreal. Definitely a color that mermaids will wear - they exist, don't they? ;)


*_* I want to take a swim in there!
The formula of this was pretty good. It was a little runny but still manageable. It took about three thin coats to be opaque.

What do you think of this color? Do you have one of the dupes?

xoxo,
mich

Saturday, May 5, 2012

Nail Ideas: Cupcakes!

Whoaaa~ Second post in a day! :o
Not only that, it's also The Polish Well's 100th post!! *throws confetti* :party

To celebrate, what do you say to some cupcakes?

Actually, I also did this manicure for a nail art contest at The Polished Momma but didn't realize that it would end in less than 24 hours. So instead of publishing it tomorrow, I had to publish this a day earlier!
Yes, I'm cutting it a little close this time! :f lol!


I had been itching to try a cupcake manicure ever since I saw this really cute cupcake manicure by Trincess on Emerald Sparkled a long time ago. I was reminded of cupcakes again when I did this jelly sandwich recently with Essie Marshmallow and Lynnderella's The Glittering Crowd:

Doesn't it look yummy!?
So I added my own twist to the cupcake manicure by using the jelly sandwich for the frosting on the cupcake. I decided to stick with using stripes and polka dots on the middle finger and pinky as I thought they matched the cupcake perfectly. Since the ombre or gradient manicure is starting to be popular again, I jumped on the bandwagon to do a gradient for my index finger to complete the skittles manicure. ^_^

Of course, a cute and sweet manicure wouldn't be complete without... mattifying everything!!

Doesn't it look all soft and fuzzy now? <3
So.... What do you think of my cupcake? Hungry yet? ;)

xoxo,
mich

Moarr Nail Polish Jewelry!

Gooooood morning, starshine! The earth says hellooooo!!

I'm back from the depths of hell!! :e Have you missed me? ;)
I've finally finished the last of my exams in law school and that means... freedom!!! At least until the results are released :f

Anyway, while I take a few days off to slack my arse off before I start watermarking my swatch photos, I shall show you this amazing little beauty that accompanied me throughout my exams:

The Galaxy Ring
Gorgeousssss, isn't it?! My eyes popped when I unveiled this from the packaging! My own little galaxy on a ring!! I absolutely love the color combination - blue and purple are my favorite colors! To top it all off, there are small holographic glitters that sparkle a billion colors under the sun! <3


Before you ask... nope, I didn't make this myself! I'm not that skilled yet. lol!

A few weeks ago, we were contacted by Mel from Posh Polish, a local blogshop selling nail polish jewelries, asking if we would like to review her jewelry. After checking out her shop, I must admit I was quite impressed with Posh Polish. Unlike most other sellers, Posh Polish releases new designs in collections - each with a specific theme such as "Polka Dot Madness", "Walk on the Wild Side" and "Somewhere over the Rainbow". Apart from offering polish colors, she also incorporates layerings and nail art in her works! That really caught my attention, so I agreed to a review.

If you remember, I had my first 'mini' nail polish jewelry haul a few months back and brought home a few rings made with some VHTF nail colors. This time, to make the review more interesting, I've decided to break out of my comfort zone and try my hand at customizing my own polish ring! I'm not sure about you but "customization" used to be pretty intimidating to me. >.< Although I paint my nails often, I'm absolutely clueless about what works best in jewelry making!

Thankfully, Mel was very patient and the whole process turned out to be much easier than I'd thought.
I told Mel my preference for a galaxy-inspired look and she made several helpful suggestions for me to choose from. You can just about imagine my relief when I didn't have to bother myself with the details! :P I also picked the oval cabochon since I thought it would look better on my stubby fingers. It wasn't long (like a day perhaps?) before Mel sent me a picture of this cabochon. It was definitely love at first sight! :L When Mel asked if I wanted to make any modifications, of course, I said no! She also volunteered to take a picture of the cabochon over different oval ring settings before attaching it so I could choose which look I preferred! *thumbs up for the excellent service! :tup * In the end, I stuck with the Aztec setting which, I thought, frames the cabochon very nicely! ^_^


All in all, it took about a week for my ring to make its way to my house!
It was very safely and snugly wrapped in layers of bubble wrap - hell yeah, I enjoyed popping those bubbles. 8) There was even a small wad of paper wedged in the ring to prevent it from scrunching up in case of rough handling by the mailman. Mel also provides a ziplock bag for you to keep the ring away from the moisture and humidity in the air. Really thoughtful!

I hope my review has helped ease some of your concerns about customization!
Even if you feel uninspired, you can always browse through the different collections that Posh Polish puts out every now and then! I'm pretty sure there will be a design or two that will catch your fancy ;)

xoxo,
mich

*product was provided for honest review and did not influenced my opinion in any way. For more information, please see our disclosure policy*

Wednesday, May 2, 2012

My Nail Care Regime...

Another scheduled post - damn the exams! Since I didn't have the time to swatch, I've decided to show you my nail care regime today!

A number of you have asked for some tips on hand care so I thought I would just share what I use to keep my nails the way they are. Of course, I don't claim to have expert knowledge in this area! These are just what I use regularly - well, kind of regularly, you'll see.


Needless to say, I am not big on nail care! Just look at the picture - a grand total of five items! lol! I am pretty thankful that my hands seldom give me any trouble so I don't really need a lot of products to keep them looking healthy. It also helps that we don't have very harsh winters in Singapore - it's just hot and very humid all year long! :fire

Cuticle remover
I've only recently started using a cuticle remover so this is the first I've tried. I spotted it at a Watsons outlet and decided to give it a shot. I use this when my cuticles get a little rough-looking - it's rare but it does happen every now and then. It helps to remove the occasional dead flap of cuticle that I may have. I also use the built-in pusher-tip to push back my cuticles before I wash away the gel.
On another note, it seems to be really good at removing stains on the nails near my cuticles. I'm kind of tempted to smear this over my entire nail to remove all the staining! xD I don't really dare to try it though. Has anyone tried it before?

Clipper and Glass Nail File
I shorten my nails at least once a week because they often get in the way when I type on the computer.
I know some people don't recommend nail clipping but it works fine for me - no chipping or peeling. I am not that patient to use the file to take down length! :p The only thing that I have to be careful with is over-shortening my nails. Unfortunately, that happens quite often so I sport really short nubbins sometimes. :||
After clipping, I will use the glass nail file to shape my nails and get a smooth edge.

Hand & Nail Creams
Before I go any further, I have a confession to make - I am not religious with my moisturizing routine (or any beauty routine for that matter). Rather, I routinely skip the moisturizers and only pull them out when my hands are getting a little too dry. >.< This is definitely not recommended so... let's try to moisturize regularly, shall we? *pinky promise*
I use Lush's Lemony Flutter on my cuticles at night as it is rather oily. I will dab a small amount on each of my cuticles, climb into bed and slowly massage my cuticles until I get really sleepy. In the morning, I will wake up to nice and soft cuticles! :L
I use the Vaseline in the daytime as it gets absorbed really quickly. I've once smeared them all over my nails and fingertips before getting distracted by a clip online. By the time I got around to rubbing them in five minutes later, they are more or less absorbed. Impressive! Of course, it is not as moisturizing as Lemony Flutter but it does a pretty good job when I'm on the go.

Base & Top Coats
I didn't add them into the picture because I've recently changed my base coat and it doesn't seem to be working well on me. I've previously used NailTek Foundation II and I find that it significantly strengthened my nails. I hardly experienced any peeling even after intensive swatching sessions. I didn't have that much luck with Poshe Nail-Strengthening base coat so I'm probably going to switch back to NailTek after I finish this bottle of Poshe.
I also use Seche Vite as my top-coat. I know that NailTek and Seche Vite are not B3F but it doesn't really bother me that much for now... I think. :/

So... that's basically all the nail care products I use! They've worked pretty well for me so far :i
But remember, what works for me may not work for everyone!
Let us know if you have any other good hand and/or nail care products that you want to recommend!

xoxo,
mich