
My solution? Swatch sticks.
Take a look:
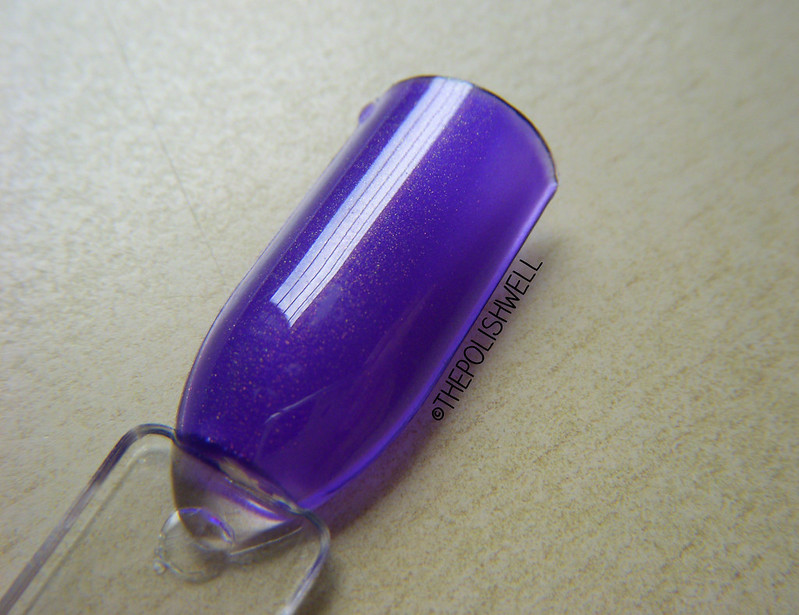 |
| The model: Max Fantasy Fire (5 coats on its own) |
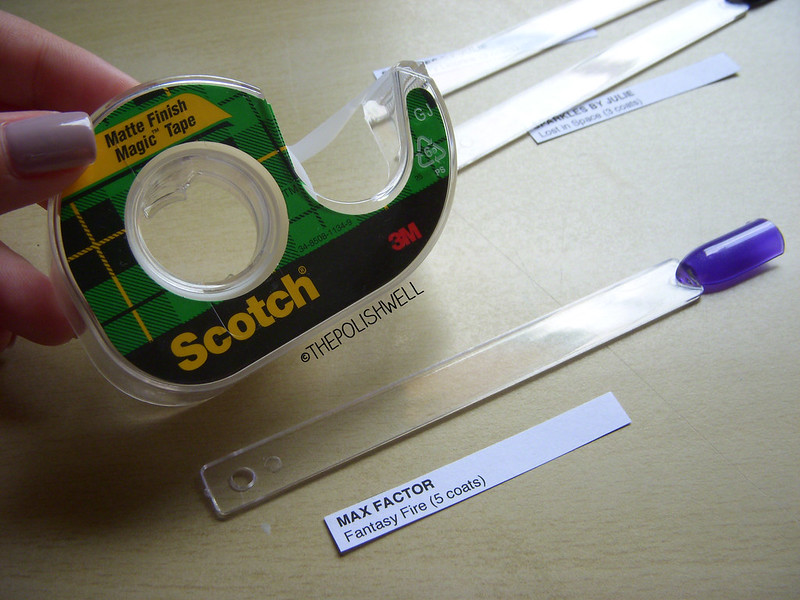
As I swatch the polishes, I took down the names of the polishes in the order I swatch them and the corresponding number of coats it took to reach opacity. While waiting for them to dry, I create labels for my swatch sticks.
Because I know my handwriting probably can't fit onto the sticks, I decided to type them out instead. I measured the sides of the sticks and created a table in Microsoft Word, specifying the width and height of the cells (in my case I used: 0.8cm x 6cm). Then I typed the brand name (in bold and caps); the name of the polish; and the number of coats applied in brackets. In case you are wondering, I used Helvetica, 8pt to make sure the words fit comfortably in the table cells. You can see how it looks in the picture below. After printing the table, I proceeded to cut the labels one-by-one.
Of course, you can save a lot of trouble if you have those label-machines and other fancy gadgets but I didn't have those so I did everything the tedious way.
 |
| Wearing OPI Steady As She Rose on the nails... |
After labeling, all you have to do is to arrange them however you like!
I organized them by color for ease of comparison and because they look so pretty like that:
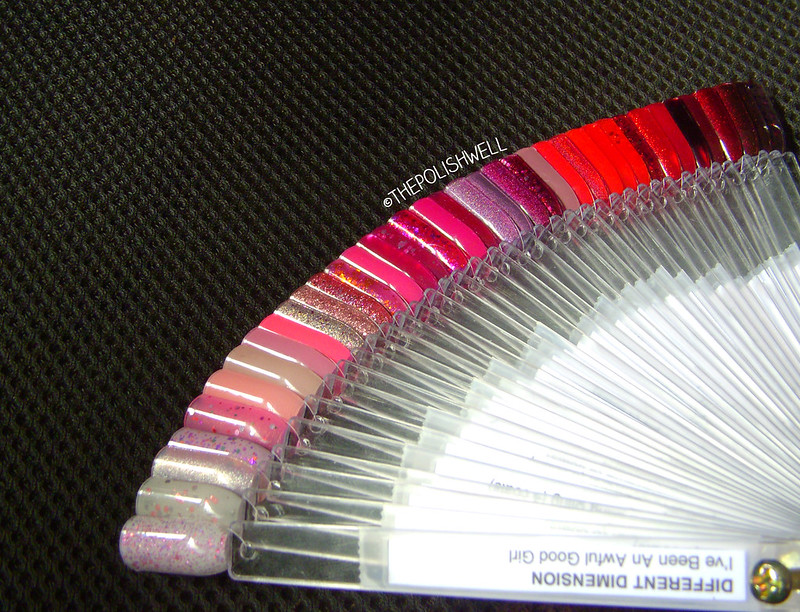 |
| The pinks and reds... |
 |
| The beiges, browns, orange, yellow and greens |
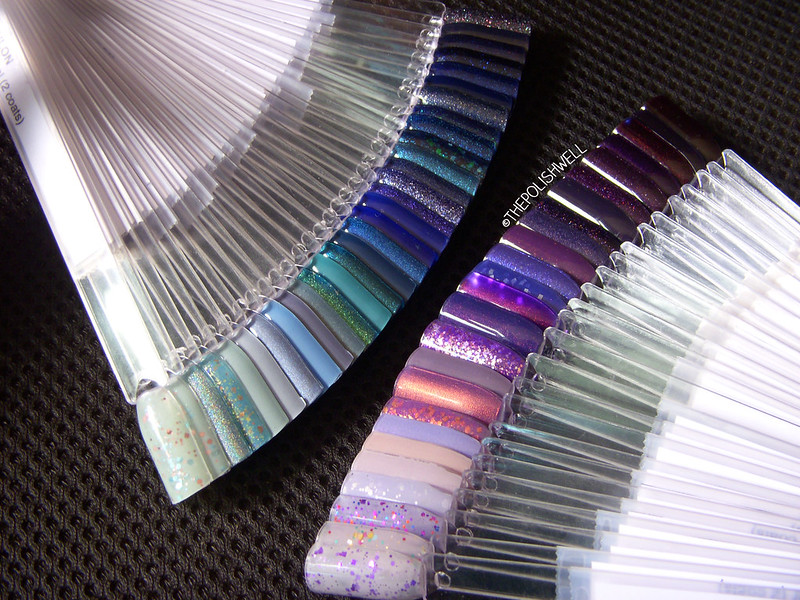 |
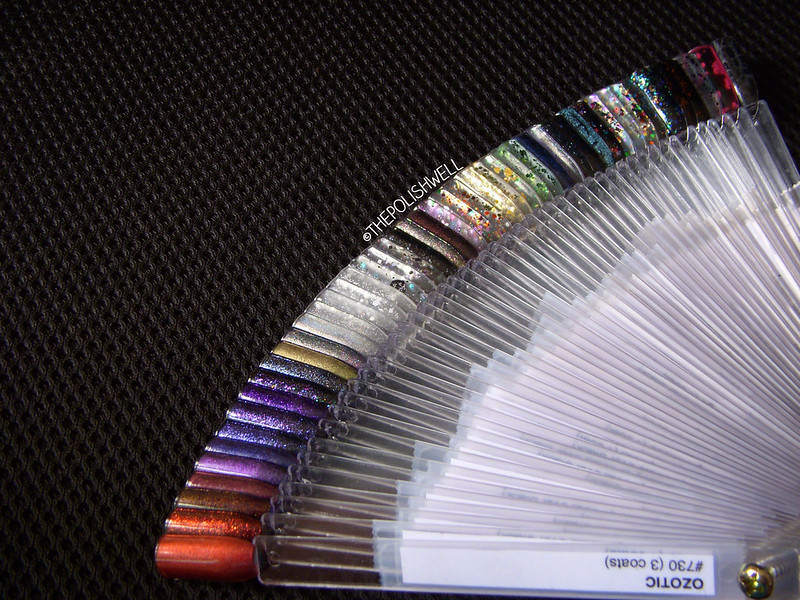
| The blues and purples... |
 |
| The whites, greys and blacks... |
 |
| The duochromes and toppers |
- Everything is organized neatly
- It is easy to compare colors
- You can rearrange them however and whenever you like
- You can admire the colors in your stash all at once without needing 200++ fingernails
- It is easier to find undies for toppers too
The only drawback is that you will have to find a place to store these sticks but I can live with that. :P
Just in case you are wondering, I organize my polish bottles by brand and name (alphabetical order) because bottles from the same brand fit better together. I will pick the color from the sticks and look for it in the drawers with the brand and name.
How do you organize your stash? :$
xoxo,
mich


*_* Awesome! This is how I want to do my swatches too, but nail wheels are cheaper than the sticks. Where did you get yours from, and how much were they, if you don't mind my asking :)
ReplyDeleteso lovely! im facing the same thing so i was wondering where you bought your swatch sticks? i would love to try this out!
ReplyDeletethanks for the how to, I'm just about to buy myself some too!
ReplyDeleteI organize mine by brand, then by color. I am waiting on a big order of these sticks, though, so I can do like you and put them all in color order then just look for the specific polish I want. Although, it's going to be a very daunting task with over 600 polishes! Yikes!
ReplyDeleteI've been organising by brand, using wheels for swatches. I may have to switch to these though, the wheel system is a bit out of control!
ReplyDeleteI've just ordered 200 of these a week ago, I got a helmer yesterday, I started 2013 with the invention to organise my polish stash too! now I need to order some more as I'm over 200 polishes!
ReplyDeleteIn my Helmer it is organized by brand, some brands are combined in 1 drawer. If I have 1/2/3 bottles of 1 brand they go into the singles drawer :). 1 drawer just for indies, 1 drawer just for topcoats and such, 1 drawer for other nailart stuff...
ReplyDeleteI loooove these swatchsticks but unfortunately already use another system - and redoing everything just doesn't sound to appealing with 500 polishes haha!
Thank you Erica!
ReplyDeleteI did consider getting nail wheels but I think I will never get around to swatching because I am very fickle-minded when it comes to deciding which colors go next to each other. :P
I got my swatch sticks from a chinese website for about S$2 per set of 50 sticks! :)
Thank you Jackie! I bought my sticks from a chinese website at about S$2 per pack of 50 sticks. I think you can find them at a good price on eBay as well! :)
ReplyDeleteWheeee :D You're most welcome!
ReplyDeleteLOL! I'm glad I decided to swatch when my stash is still relatively small. It already gave me quite a neck-ache! But it is definitely worth it ;)
ReplyDeleteI did consider getting nail wheels but I was afraid of that problem too! With swatch sticks, I can always add more and rearrange them however I like :D
ReplyDelete*high5* I arrange my helmer in almost the same way! :D
ReplyDeleteAnd swatching 500 polishes in one go does sound very daunting :P
lol!!! I bought 300 sticks the first time and I have some left over but I still ordered more not long ago just in case. At the rate I buy polish, I have a feeling I will need them sooner or later ;P
ReplyDeleteI just ordered 350 of these last week (even though I need at least 500!) to work on the same project! My suggestion for you, print your labels on label paper, then you can just cut, peel, and stick without the tape! Avery makes full page labels (http://www.amazon.com/Avery%C2%AE-Full-Sheet-Printers-TrueBlock-Technology/dp/B000093L1J/ref=sr_1_1?ie=UTF8&qid=1358690773&sr=8-1&keywords=label+paper) and they're pretty inexpensive!
ReplyDeleteWah, this is actually very clever! I have ~100 bottles and have been using nail wheels to keep track but after a while they got really um, unorganized. So looks like I need to order some swatch sticks in the near future.
ReplyDeleteAnd speaking of organizing, I arrange my bottles by brand first (my inner OCD prefers bottles of the same shapes closer together!) and then by color. I actually don't have a dedicated helmer, I keep them in shoe boxes b/c initially I didn't think my collection would get this large! ;p
mich i love them, so pretty! :)
ReplyDeleteI had thought of using nail wheels too but I decided I will probably need to rearrange the colors every now and then so I got the sticks instead :P
ReplyDeleteAnd I totally agree with you!! I also prefer the same bottle shapes together haha!!
I suspect you will have to upgrade to either a helmer or huge shoe rack soon! Don't we all? ;D
Thank you mich!! I can't stop staring at them :P
ReplyDeleteThey look so pretty! I bought swatch sticks off eBay last month and got wrinkly ones :( I thought I was safe because it was sold over 4,000 times but nope, got bad ones anyway. Painting on top doesn't work, neither does painting under *sigh*
ReplyDeleteHey. What do you mean by painting the polish underside of the tip? I do not quite understand what you mean also by "I can see how the polish looks sans top coat on the underside as well." Can you explain so that I can also use this method by clearly understanding what I am doing rather than following blindly? Thank you.
ReplyDeleteHahah, that's so true! My collection started with one small box then it grew to two boxes... and now there's four! Lol!
ReplyDeleteI found your post really helful when it came to dimensions and typing the names, I'd not considered how I would label the sticks. They arrived today, so I have now done the top drawer of my helmer. Only two (150 bottles...) more to go :)
ReplyDeletewhee! Happy swatching!! They will look marvellous when they are done :D
ReplyDeleteThank you Priscilla! ^_^
ReplyDeleteOh are the swatch sticks already wrinkly when they came? D:
Some of my polishes wrinkled my sticks a little (and had a foul smell =x ) but most of them are ok!
Oohhhh!! Thank you Stacy!! :D <3<3
ReplyDeleteThis looks AMAZING. I own nothing like this many nail polishes, but my collection is beginning to grow, and I've just ordered some of these so I can make a pretty set of them too! x
ReplyDeleteI found a way to prevent to wrinkles: adding a white school glue as a base coat! :D I managed to save more around 30 out of 50 sticks (:
ReplyDeleteThe underside meaning the concave side. That way, you can see how the polish looks like without (sans) top coat. But if you flip over, you will see the glossy side. Hope this clarifies things a little! :)
ReplyDeleteThank you Olivia! <3 *blushes*
ReplyDeleteThank you Toni! <3 I'm sure your collection will grow in no time and you'll love the swatch sticks :D
ReplyDelete!!!!! Genius!! :D
ReplyDeleteWill it peel off easily though??
Hi but what does sans means? Thanks for the reply!!
ReplyDeleteCan you share (or email) the weblink? I'm always afraid of unknown sites until I know they're trusted :)
ReplyDeleteI got them from taobao.com :) It is something like ebay though and there are many sellers. I am not sure which seller my friend bought from though =\
ReplyDeleteThanks so much for the inspiration. I have finally started my project and you helped a lot with getting my head around the whole ordeal! I mentioned you in my blog (http://glam-madam.blogspot.co.nz/2013/05/nail-swatch-sticks-part-two.html). Am very envious of your collection - it looks like the ultimate paint store! Cheers to you!
ReplyDeleteThank you for the mention! <3
ReplyDeleteWow! Great tips here as I just set out on my nail polish organization quest. I just wanted to comment and say that you have probably the most gorgeous collection i've seen ever! :)
ReplyDeleteAww thank you Meg! <3
ReplyDeletethis is nothing less than GENIUS! #nailed
ReplyDeleteThis is what I do also. The only problem I found is if I put the polish on top of the sticks, after a few weeks, the colour starts get a dusty white coat on them. So I'd have to take the polish off and restart again. BUT now I'm going to redo my nail sticks, like you've done them, and hopefully that will save my sanity lol. :)
ReplyDeleteHopefully it will work for you too! ^_^
ReplyDeletewhere did you find the clear swatch sticks? i cant find them at a reasonable price anywhere! thanks xx
ReplyDeleteHi Brooke! I believe you can find them on eBay at rather affordable prices :)
ReplyDeletecould you tell me the name and brand of the polish if you look at the picture labeled blues and purples, on the purple fan if you start at the bottom of the picture and count up to stick number 9, its a pinky-purple color with tons of golden shimmer.It is gorgeous! Thanks!
ReplyDeleteI believe it is Orly's Fantasea. Such is beauty isn't she? <3
ReplyDeleteHi I recently received these exact swatch sticks as a present from a friend and want to organize the label exactly as you did! Only problem: I cant seem to figure out HOW to make a table on Microsoft, or Excel for that matter! Could you PLEASE email me at missthang436@gmail.com and describe word from word on how to do it and apply the size? I am completely lost and need help if its not too much of a bother!
ReplyDeleteIt's so pretty and neat :)
ReplyDeletedid you swatch textured polishes on the underside as well? What exactly turned the polishes matte on the sticks?
ReplyDeleteThis is brilliant! If they're not neat they look awful. Thanks
ReplyDeleteI know this article maybe a bit old, but I really thank you for posting this :D I have tons of nail polish collection as well, collecting those through the years XD but never it got in my mind (during those days) to swatch it but just recently. Now, am looking for good swatch sticks, on where to buy, I bump into this blog. And I thank you for sharing your idea on how to swatch a nail polish, since it will be my first time to swatch when the swatch stick arrive :D This is really helpful ;) I hope when I do my swatch for the first time, I will swatch as clean as yours =D *inspired*
ReplyDeleteI need help with this too I've tried making the table and oh what a mess please can u post the steps that u used much appreciated x
ReplyDeleteCool and that i have a dandy proposal: How Many Home Renovation Shows Are There house renovation credit
ReplyDelete